My Mixing and Mastering Process
Mixing
Mixing can be a tough thing to do, in particular as you try to ensure that your balance of volume is consistent from track to track.
To make this simpler, I take advantage of output buses in Reason. Output buses allow me to take all of the tracks of a section, such as the 12 strings of an acoustic guitar, or the fretless and picked bass guitar patches, and route them to a single slider on the mixing board, the tangerine and olive colored tracks below. This allows me to mix each instrument, or in the case of orchestral sections such as brass, which groups trumpet, horn, trombone, and tuba, as a single entity.

I have a very specific approach to mixing from a mental model standpoint. I first bring up the Drums group to a certain point, fixing on the volume of the snare drum and checking the level on the output.
Once that is set, I then bring up the non-solo instrument sections one by one. My goal oftentimes is to bring them up until I just barely hear them, and then selectively mute each section to identify the impact of the section on the overall sound. This is particularly true of bass and standalone instruments like a Theremin that are primarily ornamental. At times it’s hard to tell where some instruments actually are, and a sudden removal is a good way to determine that.
Once the music is set, I thing bring up the solos, using the same balanced mental model. I watch for red-lining on the sliders; they are places where distortion can occur, and red-lining in the master output will definitely cause issues at mastering time. I target about -5 db from normal for my master output.
It’s super important to make sure that you use the same system volume and headset so that you are always comparing what you hear consistently both within the existing track, but also as you try to balance overall volume with other tracks.
Compression
I’m not a professional producer or sound engineer, and compression tends to be a major challenge for me. I’ve tried a multitude of different mindsets to try to arrive at the proper compression level when applying it to the entirety of a mix.
My first three albums, I applied compression across the entirety of the mix as I was mixing. This had a few unintended side effects that it took me a while to really comprehend. First, it overcut my dynamics, and second, it impacted the overall mixing levels each time I made an adjustment. I could never get the threshold and release settings quite exactly right. I counterbalanced that my using less compression at mastering, but didn’t quite comprehend that the root cause was applying compression too early.
I made an adjustment with Servings Of Sadness, deciding not to employ mix level compression at all, and saving it for the mastering phase, so I could apply compression to an already well-formed audio track. That seemed to work a lot better as far as my comfort level with the overall mix.
Equalization
Romance Under Review suffers from what I consider incompetent equalization techniques. After that release, I spent a great deal of time researching it, and still don’t think I do the best job of, but I’ve steadily improved.
Because each instrument group needs equalization, I don’t equalize the overall track; instead I utilize the output buses I’ve already created and apply equalization to each group. I use the equalizer graph for the main track to make sure I’m not missing something major, but still make adjustments at the instrument level.
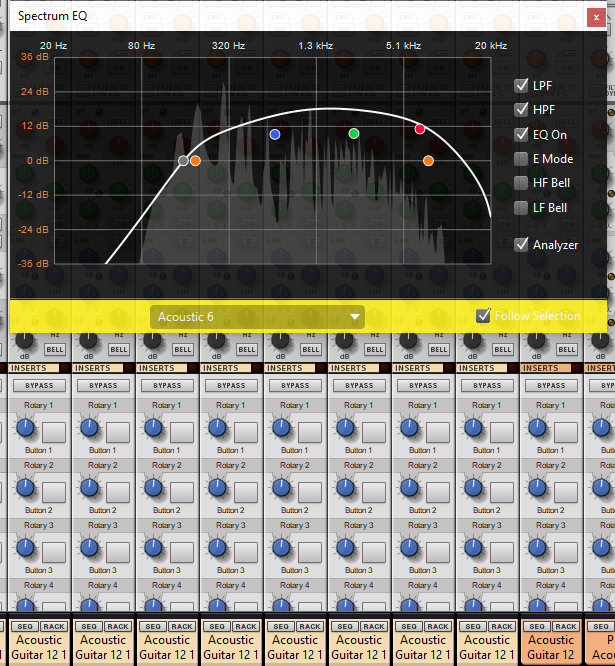
The built in equalizer in Reason contains both high pass and low pass filters, that I used constantly on my first three releases. As I was deep diving into equalization challenges with Servings Of Sadness, I discovered use cases to remove the high pass filter to allow a clearer deep end in the bass, and have made adjustments there.
In my experience, instruments like the snare drum and hi hats, the bass, and solo guitars benefit the most from targeted equalization, but again, I’m not a sound engineer.
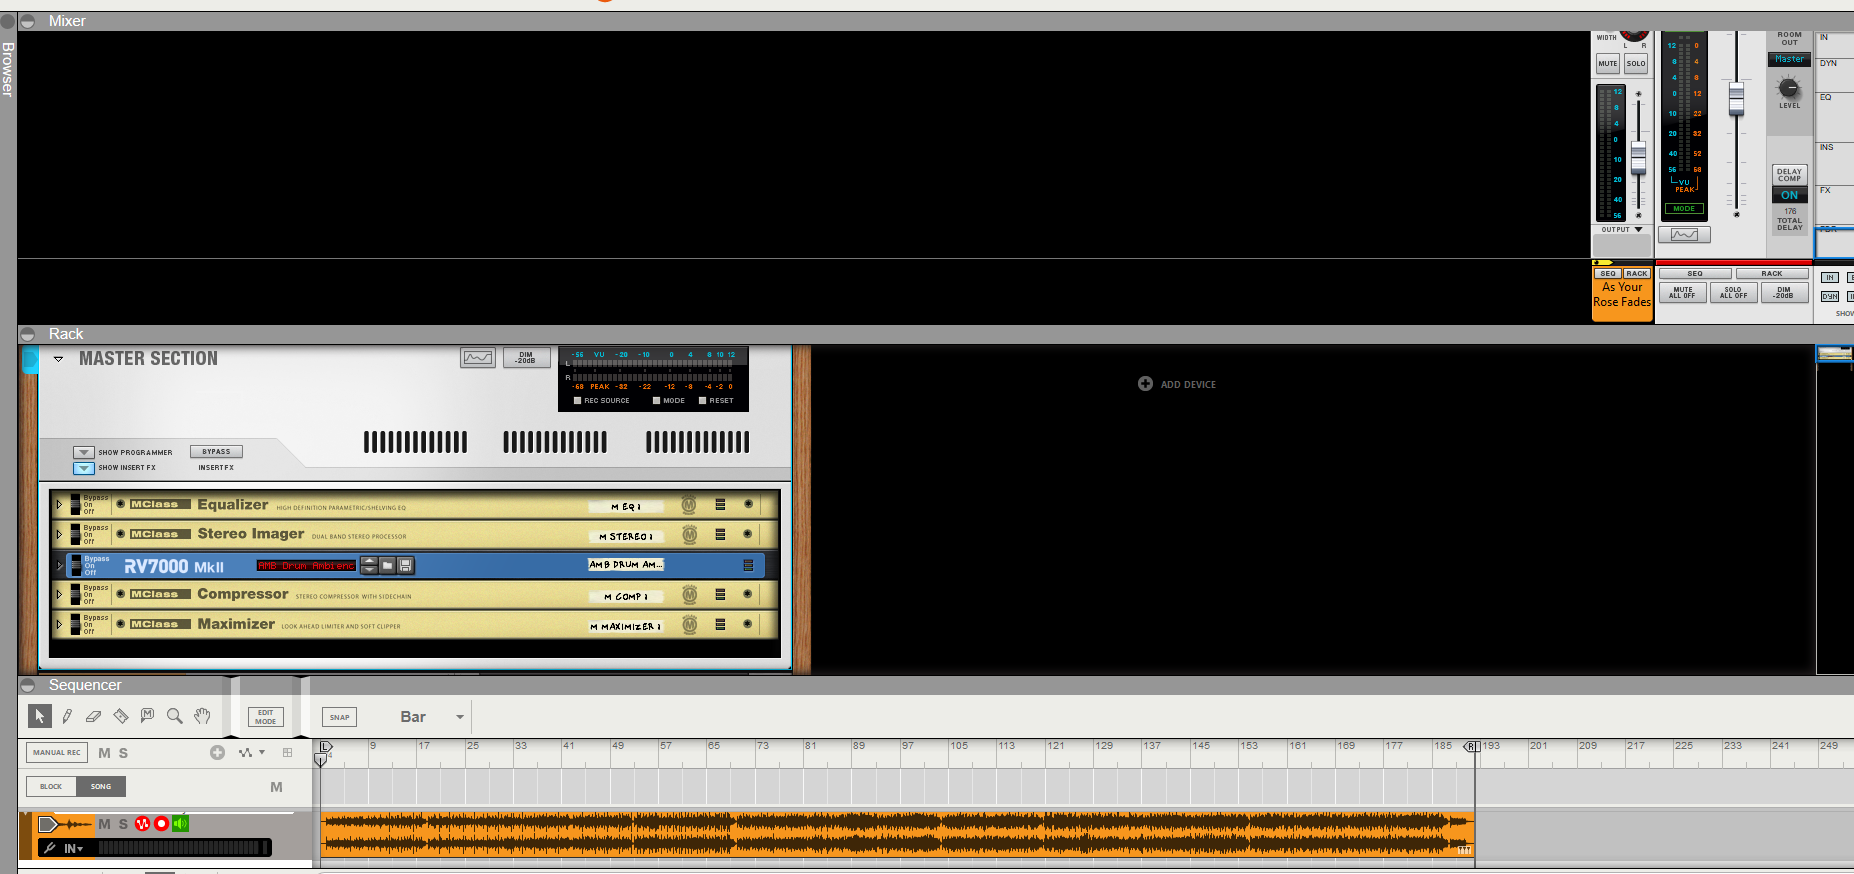
Mastering
My process for mastering is fairly straightforward. Mastering is the last stop where I can apply any overall effects, any overall compression, and make sure my final output level is as close to the right level as I can make it.
I first export my mix to a single audio file. I then create a new project in Reason, a Master project, and preload a set of effects that include an equalizer, a stereo imager, a digital reverb, a compressor, and a maximizer. These effects are programmed as a template for each release, in case I need to adjust them from album to album, but I am careful to make sure they are consistent for each track for each release.
I then insert a bar of time before the audio file, as a “lead in” for the track, and set the end point of the track 2-3 seconds after the end of the audio file. This creates the correct space around the track for playback. I then adjust the output volume to reach 0db, with no spikes or red-lining.
Once that is complete, I export out my “final track”, and that is the one I send off to my publishing company, Tunecore.
Be welcome and true.

